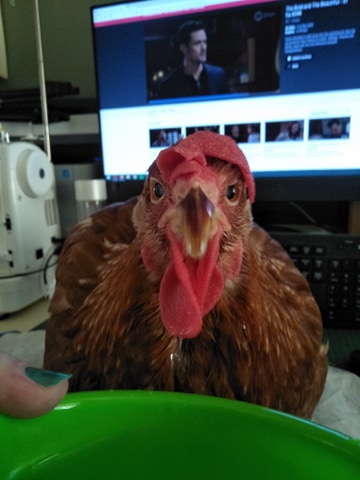
Dedicated to Ophelia – a very special chicken, and my biggest fan
Today we are talking about adhesives, and there are so many different options, each suited for a variety of uses. Over the years I’ve found that adhesives fall into one of three categories …
Spray adhesives
Liquid adhesives
Dry adhesives
Having a sound understanding the strengths and weaknesses and the pros and cons of each different kind of adhesive is beneficial to all crafters. Having a good knowledge of what the different adhesives have to offer can help save your hard work and your beautiful project from a tragic end at the hands of poor glue choices.
Spray Adhesives
Spray adhesives pretty much fall into two categories … aerosol spray and pump spray.
One of the benefits of a spray adhesive is that you can cover a large area really quickly with a fine mist of adhesive. So if you are working on something quite large, like basting a quilt top to the batting, spray adhesive is widely used. This is also handy if you are working on something that is quite intricate, like a detailed die-cut shape. There are times when applying Liquid Glue would not only be messy, but by the time you got from one end to the other, the glue you applied first would be dry and the whole exercise would have been an enormous waste of time. While you could use a double sided adhesive on an intricate die-cut shape, sometimes that can turn out to be expensive, so you need to weigh your options.
First, let’s talk about basting spray for quilters. I asked Marni from Frankensteins Fabrics, who is my long arm quilter (you met her back in episode 5 when we talked about the top 10 things you need to start quilt making).
Episode 5 – Top 10 things you need to start quilting
If you are sending your quilt top, backing and wadding to your long arm quilter, there is no need to spray baste. Because of the way the quilting machine is set up, the quilt top, wadding and backing are fed through the machine via a clever roller system. If you were to spray baste, it would need to be pulled apart, so always check with your long arm quilter before you use any type of adhesive. However, if you are quilting your project at home, and pinning isn’t an option for you, using a spray adhesive is a great way to hold it all together. Marni recommends that spray adhesive only be used for smaller projects … certainly nothing larger than a double bed sized quilt. This is because the larger your project is, the more you will be handling it under your machine, and the more you handle it, the more likely the glue will pull apart. She recommends 505 as the best basting spray adhesive, and her hot tip is to press it to ensure optimal adhesion. I will link to a blog post that Marni wrote about spray adhesives for quilting in the show notes, for those who want to learn more.
Marni’s Blog
There’s another pitfall to adding a spray adhesive to fabric sewing projects, or using fabrics that have glue in the mix. I remember having major issues with the glue in a sequined fabric I was using to make sparkly red shoes for dolls many years ago. The manufacturer of the fabric changed the adhesive, and from then on, whenever I stitched through that fabric, the sewing machine needle would be gummed up with glue every 3 or 4 stitches. I had to keep eucalyptus oil by the machine and was constantly cleaning the needle as it picked up the adhesive between the sequins and the fabric. It took twenty times longer to sew these little dolly shoes than it should have, and I quickly found a substitute fabric that made less of a sticky mess. So if you are stitching through fabric that has had adhesive added, remember to check your needle as you go, and clean when necessary.
While there are some down-sides to using an aerosol spray adhesive, there are some up-sides. One press of a button and an even application will have a large area covered with a fine mist of adhesive very quickly. If you have arthritis or mobility issues with your hands, a pump spray or pinning may be out of the question. Also handy if you are in a hurry, and this job just needs to be done!
Personally, I prefer not to use aerosol adhesive sprays … it’s just my preference, mostly for environmental reasons. A pump spray adhesive is something that I would consider, though, for intricate dies. I do a lot of card making, and I have some beautiful intricate dies. I don’t use them all that much just because it can be difficult to apply the adhesive on the back. I’m currently wishing I’d spent more time at the E6000 booth at Creativation to learn more about their spay adhesives.
Regardless of which spray adhesive you choose, make sure that you follow the instructions when you’re finished, to clear the nozzle so that it doesn’t become gummed up. Remember … you’re spraying glue … it’s sticky … follow the instructions so you don’t end up throwing away a full container because the nozzle can’t be saved.
Liquid Adhesives
One of my fondest memories of crafting in the late 70’s and 80s is using old school clear craft glue. If you’ve used it, then you’ll know that distinctive craft glue smell, which needed to be used in a well ventilated space. Like everyone else, my favorite part about it was going “Oh no, I got glue on my hands now I have to peel it off.” moment. I cannot be alone here! Please somebody tell me that you used to do that as well. I have to admit I don’t use it anymore, but back then there was less choice when it came to adhesives. Of course, you can still buy it, and it’s useful for a lot of things, but we have more options now. There are also two things that that does not do well. Do NOT use it on polystyrene. It will melt the polystyrene thanks to a chemical reaction that is kind of cool, but it will melt your polystyrene and render it unusable. So if you need to use an adhesive on polystyrene, I recommend that you use a white glue like white wood glue because it’s not going to damage your polystyrene piece. The other thing you need to keep clear craft glue away from is fabric. It will soak the fabric 100% and when it dries, it dries hard and stiff and it will likely also change the color of the fabric. It is very obvious and crunchy and gross.
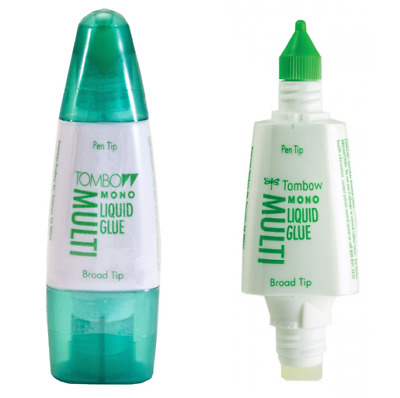
A very popular liquid glue is white glue, also known as wood glue. Woodworkers use it, but it’s amazing for other applications, and there are different versions of it. White craft glue sticks pretty much anything to anything. In the craft industry, there are different kinds of white clues. My personal favorite is Tombow Mono liquid glue. Oh man. I love that stuff. I love it so much! I am very excited that I finally found an Australian supplier and finally have it restocked in the shop.
Tombow Mono Liquid Glue
I have been using it for well over a decade, and one of those little bottles lasts me a really long time … years and years. The bottle is double ended, with a fine applicator tip on one end and a broad silicon chisel applicator at the other end. Mostly I use the fine applicator, but occasionally if I need to spread that glue out over a larger area, I will use that wider silicon chisel at the other end. It does a fantastic job, and if the glue gets a little bit caught up in the nozzle, it is quick and easy to clear out. This glue is also dual purpose because it acts as both a permanent and a temporary adhesive. If you’re wondering, How is this even possible, I’ll tell you. When you apply the liquid glue it is white, and if you stick it straight down that is the permanent adhesive. However, if you apply it to your project and wait until it dries clear, then stick it down, it is a temporary adhesive. It’s archival, it’s acid free, it’s safe to use and everything you could possibly wish for in a liquid glue.
Another adhesive that also pulls double duty is Glossy Accents by Ranger. Not only is Glossy Accents an adhesive, but it also creates a shiny accent spot on your project. Hence why it is named glossy accents. It’s adhesive qualities are really strong, but it’s spot gloss capabilities are also amazing. Some of the places I like to apply gloss are on stamped colored images like glasses on a critter, to make balloons look shiny or over die-cut letters so they really stand out. These accent / adhesive combos are also great for sticking down sequins or creating dimensional dew-drops on flowers.
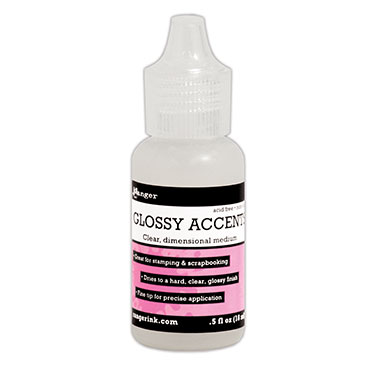
There are other brands as well, like Nuvo Crystal Glaze and Dimensional Magic, but I like the Glossy Accents because it comes in a small bottle, and doesn’t clog or thicken up like the others can do. I have a mostly full bottle of Dimensional Magic on my desk that I simply can’t use because the nib is clogged. I will probably purchase some small fine nozzle bottle, cut off the top, and pour it into the smaller bottles. Some have a pin in the top which prevent clogging, but I think once I start storing them in my Make it By Marko upside down glue bottle storage stands that I’ll have less trouble with clogged nibs. Yes, I will be stocking them soon.
I am also finding that my Nuvo Crystal Drops is getting thicker, so it takes some effort to make it a rounded droplet rather than a pointy chocolate drop. It does make great dewdrops, though.
Another fantastic adhesive that I personally like, also by Ranger, is Multi Matte Medium. It is similar to glossy accents, in that it’s a really strong adhesive, but it also the polar opposite because it’s not glossy … it is matt. It not only goes on clear and dries clear, but it dries matt. So if you use it on something and accidentally a little teeny tiny bit of glue oozes out, it’s no problem because it dries matte so there’s not a glossy little puddle of adhesive there, which I really like. Again, it comes in a tiny bottle, which I love and even if it does get clogged, it’s easy to remove the nozzle to clean it. It’s perfect for intricate diecuts and tiny things like sequins or beads, or behind the knot of a bow tied from fine thread.
As with clear craft glue, if you are going to use a liquid adhesive on fabric, you should really test it first. Even when using liquid glue on paper or cardstock, if you use too much, the card or paper can absorb excess liquid and warp. Usually you just need a small amount of glue around the edges, because these days adhesives are strong, even when used sparingly. However, if you do get a little warping (as you do when applying water to watercolour paper), there are a couple of things that can help flatten the piece. Try running it through your die-cutting machine with a shim, to apply some pressure and flatten the cardstock. Alternatively, put it under a big stack of heavy books overnight and you should have something nice and flat in the morning.
Dry Adhesives
Dry adhesives generally fall into two categories. One is a peel off kind of scenario and the other is a heat activated adhesive.
Peel-back Adhesives
Double sided tape
This has been around forever, and could be regular double sided tape, which I use a lot for cards, or foam double sided tape, which gives you a bit of dimension. When you pick up the roll, it’s not sticky, but as you peel the tape you’ll find it’s sticky underneath. Cut or tear it to size, stick it down, and then remove that paper backing, also referred to as release paper. Sometimes it is on a roll, sometimes it’s pre-cut strips or squares, but whichever way it’s laid out and packaged, it’s sticky on one side and has a peel-away backing on the other. When I first started scrapbooking I used double sided adhesive squares, called photo squares. I still have a bunch of them. I would peel a square off the roll, stick it down and then peel the paper backing off the square.
One of my favorite things about double sided tape is that it’s available in a lot of different widths. The one I used the most is 3mm, although I started with 6mm, and sometimes I use 12mm. My favourite brand is XPress It, as it’s acid-free and it’s a strong adhesive … you can even get it in high tack.
It comes in much wider rolls like 18mm, 24mm, 36mm, 48mm, 100mm, 800mm and 1020mm … that is seriously wide, and perfect if you need to apply a very full coverage of adhesive with no mess. You can also get A4 and letter-sized sheets of double sided adhesive, like the XPress It or Stick It brands. So if you are cutting out a large and very intricate die, you can first apply double sided tape to the back of the cardstock, and the die will cut through the adhesive as well. Essentially, you are creating a die-cut sticker, and all you need to do to stick it down is peel away that release paper and stick it down. Much simpler than placing tiny dots of liquid adhesive to all the little touch points on the back of your very lacy die-cut shape, and less messy than a spray adhesive. All three will do the job, but it’s up to you which you choose. That choice is going to be different for everyone. Spray adhesive is quick and easy, but not good for those with asthma or breathing issues. Glue is not great for people in a hurry or not deft with a light hand. And very wide rolls or sheets of double sided tape can be expensive. There’s a lot to consider, and it’s kind of a personal choice.

Another fun dry adhesive is the Xyron sticker maker. I have a couple of them, and it’s a small tool that applies an even amount of adhesive to fiddly or small pieces. It has replaceable cartridges, with options for permanent or temporary adhesive. Back in my scrapbooking days, I invested in the original Sizzix machine (that one with the pull-down handle). I bought a lot of alphabet die sets which I used for my page titles. A lot of the alphabets had had these tiny letters, and they often a co-ordinating shadow die, and applying liquid adhesive to them was sometimes problematic. Instead I would drop them into my Xyron sticker maker and do a big batch of them at a time. The reason I batched the letters, putting them all through at once was because there is a bit of waste at the beginning of each sticker-making session from where you needed to pull the adhesive strip through to tear it off. So, to minimise waste, I would do lots and lots of letters at once. Sometimes you’ll get little stringy bits of adhesive showing here and there, like in the small gaps in letters, but it’s not difficult to get rid of those (and I will talk about that in a moment).
Heat Activated Adhesives
Heat activated adhesives are mostly used for sewing and fabric related projects.
Iron on pellon
Oh my goodness I love iron on pellon (or really any pellon … it doesn’t have to be iron-on). It’s like a really light wadding. I adore it for embroidery projects, as a little pellon behind the fabric really grounds the stitches and gives the project a little bit of dimension. I mostly use iron on pellon for zip pouches, and having that adhesive bonded to the fabric helps it stay in place, and I am much less likely to miss a piece of the wadding in a seam.
Iron on interfacing
I’ve done a lot of dress-making. I’ve been making clothes since I was 12 years old. Interfacing helps stabilise important parts of clothing, like collars, button fronts, and facings. Sure, iron on might be a teensy bit more expensive, but there’s a little more security in it … knowing it will definitely be caught into a seam, not wriggle its way out. You do need to be careful with it, though, because it’s all too easy to get a bubbling in the fabric if it’s not properly adhered.
Double sided fusible web paper
You may be thinking that you’ve never heard of such a thing, but if I called it by one of its brand names like Vliesofix or heat & bond, you might be more familiar. This is a product that is usually available by the metre, like interfacing, but the rolls are significantly smaller. The adhesive on this is on both sides, so one has the adhesive exposed (like iron on interfacing) and the other side has release paper (like double sided tape). Vliesofix is especially excellent for applique. You can iron a piece onto your fabric, cut out the shape, peel off the release paper, place the shape onto your project and press with the iron to adhere it. The benefit of doing this instead of simply pinning your applique shape to your project base is that it isn’t going to move or stretch as you stitch around the raw edges with satin stitch on your sewing machine.I always found it frustrating to do applique until I discovered Vliesofix … my stitching always ended in a different place, and I often dealt with puckers in the shape I was trying to stitch to the base. I used it on some intricately cut pieces for some mini quilts that I created for some craft swaps on Instagram, and did matchstick quilting over them, and those projects turned out great!
Episode 17 – Craft Swaps
Mending patches & hemming tape
Sometimes you can hand stitch something … sometimes you can’t. For example, I made some new clothes, kind of like short dresses or long tops, to wear with leggings, for my overseas trip in January. This is the first time I’ve done any dress making for myself in well over a decade (probably more like 2) and I thoroughly enjoyed it. I recently realised, though, that while I was making one of the tops, I had accidentally snipped the front with my scissors. There’s a hole in it and it is a clean cut. Now I could stitch it to mend it but it’s going to be really obvious, because it’s front and centre. I have decided that the smart thing for me to do is to get a thin mending patch and iron it carefully onto the back of the fabric. I feel like it will sit better and be less obvious than hand-stitching. This is the type of thing used for mending holes in the knees of jeans (although these days I think the trend is to actually put holes in your jeans on purpose so who knows), but if you’re looking for a quick mending thing, that’s no sew you can use iron-on mending patches.
Likewise, hemming tape is a quick fix for a hem that needs to be secured. Personally, that’s not something I use, but in a pinch, if you need it, it does the job. It’s a double sided so you can put it around the hem of pants, skirt, dress, etc … whatever you need to hem quickly, fold it up, press it and the hem is fused. It’s not going to last very long, especially through the wash, but it’s fast, and you can always remove it and stitch the hem properly (or take it to your local alterations expert) later when you have time.
Hot Glue
The last adhesive we’ll talk about is kind of split between 2 categories, so I thought I’d leave it until last. It’s both a heat activated adhesive AND a liquid adhesive … it’s hot glue! I’ve personally never met a crafter who doesn’t own a hot glue gun. It’s great for a lot of things, but not for everything. It’s thick and goopy, and therefore not great for things like scrapbooking, card making or dress making. What it does do well is general crafts including wood, metal, ceramic, leather, glass, and some plastic. It’s versatile, and it works best on porous surfaces. Because of that thick goopiness, it’s great for adhering uneven surfaces and filling gaps. It should go without saying, but I’m going to say it anyway … a hot glue gun is hot. You need to be very careful, because hot glue can cause very nasty burns. This is not a tool for children, and I think we’ve all suffered at the hands of some stray hot glue once or twice in our life. The most annoying thing about hot glue is all those little stringy bits, and to avoid them I like to make sure the barrel touches the surface I’m applying the hot glue to, then I wipe it off and give it a twist when removing it. You will need a heat resistant surface or stand to rest your hot glue gun on between applications, and it is going to make a mess. You’ll need more glue sticks than you think, and they come in different sizes, so make sure you get one that’s compatible with your glue gun.
Now, we’ve talked about all the things that stick things to other things, and I bet you didn’t think anyone could talk about adhesives for so long … but there you go!
Before winding up, I wanted to mention some other tools that are handy if you’re using adhesives.
Adhesive eraser
Remember earlier I talked about my Xyron sticker maker, and how sometimes there are little stringy bits of exposed adhesive left after running die-cuts through? Or those times when there’s a little liquid glue that oozes is way out of the edges, no matter how careful you are. Having exposed adhesive is not only unsightly, but it means all your hard work can be quickly undone if your beautiful handmade card is stuck inside the envelope because of oozy glue! The adhesive eraser is dominantly a papercrafting tool, and it is brilliant at removing dried adhesive from your work surface or project. It’s inexpensive, it works quickly and effectively, and they last forever. I’ve had mine for over 10 years and I’ve barely worn down the corners of it. It’s one of those tools you buy once in your lifetime. The only reason you’d buy another is if you lose it or someone takes it and you need another. It’s very handy to have on your desk wherever you’re working with glue or you know you’re going to need to remove it from the project. I think the only time it hasn’t worked was when I was trying to remove some adhesive from my Tonic Tim Holtz Glass Media Mat. Tim’s advice is to use hand sanitiser, which I tried, and it worked a treat! Isocol or a little vodka would probably also do the trick.
Xyron Adhesive Eraser
Tonic Tim Holtz Glass Media Mat
Get Unstuck
The next one is for the sewers. When you are sewing fabric that has an adhesive element, it might be no problem at all … or it might be a right royal pain. When I had my doll making business, I was sewing some sequined fabric, which I had done many times before, but this time it was causing all sorts of havoc. My guess is that the sequin adhesive had been changed, and about every 3 stitches, the sewing machine needle was gummed up with adhesive. I’ve had the same issue with scissors when cutting rubber stamps with freshly applied EZ Mount on the back. The best solution I’ve found is to keep some eucalyptus, tea tree or orange oil on my desk, and a few cotton pads or cotton buds. The oil cuts through the adhesive and cleans up my needle or scissor blades quickly (with the bonus of making my crafting space smell nice).
Adhesive Neutraliser
Lastly, I can’t forget to mention a product called Un-do. You can purchase it from craft stores sometimes, but it’s easy to get at Bunnings or your local hardware store. It is an adhesive neutraliser. It’s the safest way to remove photos that have been stuck into an old album so they avoid future damage. If you have stuck down a bunch of stickers in your planner and want to move or re-use them … you can use Un-do. When you apply it, it will soak the sticker or photo, and the page it’s on, and it will neutralise the adhesive. This allows you to safely remove the photo or sticker, and place it where it needs to go next. Once the Un-do has dried, the adhesive is reactivated. It is safe to use with photos, and it’s essentially an anti-adhesive.
As I said at the beginning … when you know the pros and cons of each different type of adhesive, you can make better choices for the project you’re working on. This is by no means an exhaustive list, but it will get you started on making great adhesive choices that will give you an amazing finish for your next craft project.
Links
Episode 5 – Top 10 things you need to start quilting
Episode 17 – Craft Swaps
Marni’s Blog
Tombow Mono Liquid Glue
Ranger Glossy Accents
Ranger Multi Medium Matte
Tonic Tim Holtz Glass Media Mat (Left Handed)
Xyron Adhesive Eraser
Double Sided Tape
Thank you Dawn – Listening to your podcasts just isn’t quite the same without her 🙂
Big hugs, Candice.
Hi Dawn,
I have a sewing related tip to share regarding adhesive. When making curtains that have a “rubber” blockout coating on the back, also called a “pass” eg 1 pass, 2 pass, 3 pass, if you pin but do not sew exactly in the same pin hole, it can be surprisingly obvious, due to the blockout nature of the fabric. To solve this issue, I hold the rod pocket & hem folds in place with painters tape from Bunnings. As it lifts easily, & tears easily, being made from paper, getting it out of your way while sewing is easy, but if you do sew over it, you can tear it away afterwards. You also do not need to use it along the full length of the fold, you can use small pieces, the size of the area the pin would hold, & the pieces can be reused for the second curtain. It works on many fabrics, handy if you have small children and are concerned about the danger of dropped pins. It works well for holding stencils down too, but there are a number of temporary adhesives, including sprays, that work for this. Another tip is, If you leave the tape for extended periods, on paper and it does not want to lift, if you use a heat gun or hair dryer for a short time to soften the adhesive, it will lift easily. I actually think of temporary adhesives as another category of adhesives, because I use quite a few types. I have used temporary glue to temporarily mount stamps to use. I have also used the Xyron eraser to help remove residual glue when unmounting stamps, because I was concerned about using chemicals, in case they damaged the stamps, but it requires a fair bit of effort. Undo and orange power work fairly well for this, and for cleaning scissors, although I have a non stick pair now, but I don’t yet know if using these products to remove glue residue will cause any long term problems.
Awesome adhesive tips, Kathy! Thank you so much for sharing them 😀