In todays episode I’m answering a question from my awesome friend Renee who wants to host a swap for her online community. She wanted to know exactly how it’s done, so I thought it would be fun to talk today about how you can be a great swap host, and also a great swap participant. I have talked about craft swaps in an episode previously, but this will be more about the technicalities of what goes on behind the scenes and what makes a swap great.
There are lots of different types of craft swaps, which I talked about in Episode 17, but the style of swap that I host are where participants create multiples of a single design, send them to me, I do the swapping around, and send them back an envelope with the same number of pieces created by other swap participants. I choose this style of swap, because it’s the style of swap we did as part of OzSwapTillYouDrop, which was a tried and true method well before I came along. Sure, I have participated in one-on-one swaps, but sometimes people don’t come through, their partner misses out, and that leads to angry and upset folks who have put in a whole lot of work, but received nothing in return. So, while it is a lot of work, I stick with the host-swaps-out method. Today I’m going to walk you through the way I choose dates & themes, announce swaps, send emails, create graphics, swap out and handle the bad stuff like complaints and problems. For anyone who thinks they might like to host a swap, I have a free PDF host checklist that you can download over on my blog. I will link to that in the show notes.
My Swap History
When I first started participating in swaps, they were with an Australian scrapbooking swap group called OzSwapTilYouDrop on Yahoo. That group was founded by Rachel Greig from Darkroom Door, then a couple of other people ran it, and eventually I took over as the group owner /coordinator. I had been participating in swaps for a few months before I volunteered to be a swap host, and there was a lot I needed to learn, and fast. I had been hosting for years before I began running the group, and at its peak we were hosting 2 swaps per week, which we did for about 18 months before scrapbooking began fading in popularity. It was a time in my life when my kids were both at school, I wasn’t running a business, and I found myself with a decent amount of time on my hands. I loved this group so much that it was the home page on my computer, and I checked in on it before I did anything else online. Some of my best friends in the world were made in that group, and to this day it stands as a very favourite phase of my life. Eventually people moved on from scrapbooking, lost interest or became too busy to participate in swaps, and the day someone hacked my Yahoo account and created a post that got me banned, was the day I shut it down. I thought I was done with swaps, until I became involved with Scrap It TV. A couple of seasons in I started a Facebook page for the show and started managing social media. I was looking for a way to keep people engaged during the shows off season, and offered a card swap. Suddenly, I was back to hosting swaps again. This intensified in 2015 when my friend Marni pointed me at some fun craft swaps that were happening on Instagram. I took a break for a few years, but I’ve been back hosting swaps that feature stamping on my own Facebook page, with up to 30 people participating in each swap.
Responsibilities
For a fun activity, there are a lot of moving parts, and each party has certain responsibilities that ensure the swap runs smoothly.
Participants … you are responsible for reading the details carefully, utilising any resources provided by your host if you need them, creating items with excellent workmanship, following the packing guidelines and posting your swap so it arrives by the due date.
Hosts … you are responsible for setting the theme & due date, giving clear instruction, providing resources that will make the process easy for participants, communicating effectively with participants, keeping swap items safe and secure in your home, enforcing rules and deadlines in the manner you have communicated (for example, don’t say you won’t accept late swaps then do, or that you will accept late swaps then don’t), swapping out, repacking and posting return swap envelopes in a timely manner.
Australia Post … you are responsible for transporting our precious swap envelopes and reading those ‘Please Do Not Bend’ messages and not folding swap envelopes in half!
A smooth running swap is a beautiful thing, and attention to detail, calendar reminders and clear communication on the part of host and participants are key to achieving that.
First time swappers
I’ve experienced it myself, and I see it all the time from new swap participants … there are nerves, and people are really reluctant to sign up even though they want to be part of the fun. The biggest worry is that their contribution to the swap won’t be good enough. It’s important to remember that you’re not the only person who is new and you’re not the only person who is worried if their work is “good enough”. In my swaps there are people joining in who are at all different levels in their card making game from beginner to Design Team member, and I strongly encourage new card makers to join. Swaps are a great way to see techniques, colour schemes and products that you may never have seen before. I know that I learned a lot about paper crafting from being part of OzSwap, and I always tell people about my friend Linda. I talked about here in Episode 12. When she joined, she was a beginner scrapbooker, and her work was tidy, but basic. Within a year she had learned all sorts of amazing skills and I still have some of her stunning handmade scrapbooking embellishments, cards and bookmarks today. Linda went on to complete dozens of albums, hundreds of cards and bookmarks, selling them at the little local cafe in her cute country town. She was an active member of our community, and we became friends in real life. One of my favourite memories was the weekend I drove out to visit her in Cowra to help her get her little crafting space organised so she could enjoy creating in there again, and you can see the photos from her room makeover as part of episode 12 on my blog. To me she is the epitome of a great swapper … she dived in, even though she was nervous, and it changed her life.
As for me … I was feeling mostly confident when I joined OzSwap, but I still had niggling worries that my work wouldn’t be good enough. I had just begun teaching at my local scrapbooking shop … in fact it was my new friend and co-worker, Karen, who introduced me to the group. However … my first swap was an absolute disaster! It was a product swap. Eyelets. There were 10 people signed up, each to contribute a different colour, and we had to send in 100 eyelets. The end result was that everyone would receive 10 eyelets from each swapper, all of whom had chosen different colours. I was so excited that I didn’t read the instructions properly, and just threw a bag of 100 eyelets into an envelope and sent them to Rachel. She was so sweet letting me know that what I actually should have done was split them into 10 baggies of 10 each, and she graciously did that for me. That was an important lesson for me to read the instructions properly, but also a great demonstration of what it meant to be a good host, and a good swap group owner. From then on I was a stickler for the rules and tried to follow instructions & guidelines to the letter, and I’ll be honest, it made me a bit of a painful group member for a while, because I complained when others didn’t follow the rules. What can I say … I’m a ruler follower!
Regardless of your level of expertise and skill, there is one piece of advice that I offer to everyone joining a craft swap for the first time. Workmanship is everything. A simple piece executed properly is hands down better than a complicated piece executed poorly. Striving for excellence in those little details is what makes a swap item great. We’re talking clean cutting lines, lining things up straight, no visible adhesive, using crisp undamaged materials, no stray threads, and taking time to centre things just so … those are the things that matter.
Also important … read those instructions and follow them. I know that some people might not understand why I do things a particular way, and so I am more than happy to answer questions any time. I’m going to answer a lot of those frequently asked questions in todays episodes, so even if you’re not interested in hosting a swap, you’ll learn a lot about why I have things the way that I do. For my card swaps, I have a fully detailed blog post and a PDF checklist that you can download and print. I created the checklists to help new swappers manage their time and make sure they’re not missing anything. It’s so easy to forget what you read in the blog post … seriously … they’re long and detailed, and our brains just don’t absorb all of the information all of the time. There are boxes to check, my postal address, due dates and everything you will need to create, pack and post your swap on time and securely. If you join a lot of swaps, it’s a good idea to plot out due dates and postage dates in your planner or on your calendar so you don’t miss the deadline.
There is a certain element of trust in a swap, both by the participant and the host. The participants trust that the host is going to take care of their products or handmade items and return an equal number of items to them in a timely manner. The host is trusting that participants will submit their swaps on time, created with good workmanship, correctly packed and sticking to the theme and guidelines. And we all trust that the postal service will deliver those envelopes in a timely manner, undamaged. Sometimes, life happens … people get busy, people get sick, mail gets lost, time slips away from us. I’ve experienced some swaps that are amazing and some that were terrible. I remember hearing nightmare stories many years ago about swap hosts absconding with all of the swap items and selling them on ebay, and people who would submit deliberately terrible work so they could receive nice pieces in return, which they went on to sell on ebay (there really used to be a big market for handmade scrapbooking embellishments and cards on ebay in the early 2000’s!). Thankfully I never had an issue with a host. I was in a well established group, recommended by a friend I trusted, that had hosts she trusted. Sadly, though, I did experience the second issue when I was the owner of OzSwapTillYouDrop. If you are hosting a handmade swap and are wondering what to do in this situation, I will tell you what I did, and perhaps that can help you decide how you would deal with it.
Storytime! Two new ladies joined the group, and joined a swap I was hosting (I’m pretty sure it was baby cards). They both turned in really poorly made cards, and didn’t follow the rules of making 6 identical cards … every card was different. On this occasion I remembered my first swap, and the disaster it was, so I gave them the benefit of the doubt … perhaps they were beginner card makers, and brand new swappers. I gave them some gentle feedback about making their cards all the same, and stressing that simple is fine, but workmanship needs proper attention. But when they signed up for another swap, also hosted by me, they did it again. I am not a fan of confrontation, nor calling people out. I like to believe in people, so I was faced with a dilemma. As group owner and swap host, I had to be the one to decide if they were simply beginners, or if they were scamming us. It was the tone of some their comments on group threads that led me to believe that it was the latter, and I had to craft and send a difficult email to both ladies. To this day I do not know for sure whether I misjudged the situation and upset a couple of card making novices, or was right and stopped my group members from being scammed over and over again … but I had to make a decision and be confident in it. Either way, both ladies left the group abruptly and with no reply to my email. That was probably 16 years ago, and I’ll be honest, I still wonder if I did the right thing.
This is why it’s so important to set rules, guidelines and boundaries around your swaps, be they small or large, product or handmade, group or one-to-one … and stick to them. The grand majority of people are amazing, but every now and then one or two unscrupulous folk will try to take advantage of the good nature of their fellow crafters. This is one of the reasons I no longer participate in one-to-one swaps. On at least two occasions I’ve been stung, where the person who was supposed to send an item to me simply did not, and once where the person sending to me had misrepresented their skill level and made something they liked instead of following my inspiration board. Coupled with having less time to do recreational craft, I just stopped joining those types of swaps. However, it is important to recognize that you will sometimes have swappers who are still learning, or have circumstances that may lead to a less than perfect envelope of swap items arriving to you. Get to know your swappers and understand their challenges. Common challenges I have seen people struggle with are budget, inexperience and disabilities. Regardless of these challenges, I still encourage people to join swaps, and for other swappers to be kind. Yes … I know … I was a real pain in the complaining department when I first started, but becoming group owner gave me a new perspective, and I chose to be a compassionate cheerleader for swappers in all circumstances (except the scammers, they can go kick rocks). There is always something kind to say to someone who has tried really hard to create something beautiful, and while swaps are mostly about the creativity and the happy mail, they are also about community. People do great work when they feel safe and supported and encouraged, which I have seen time and time again as a swap host.
OK … let’s talk technical stuff about hosting a swap.
Setting Swap Theme & Dates
When setting up a swap, there are lots of little decisions to make, but your swappers are mostly interested in the theme and the due date.
In that glorious week between Christmas and New Year, I do a lot of planning for the year ahead (usually in front of Netflix and the nice cool air conditioner). I look at my calendar, and try to split them out so that they’re evenly spaced, and the themes work with the time of year. I usually plan 5 swaps per year, and I’ll also take this time to ask my community what themes they’d be interested in seeing. This is the time that I plot out dates, including announcement, sign-up deadline, due date and the date I will swap out. I decide on the themes, make the graphics (which we’ll talk about shortly), sign-up forms, blog posts and schedule it all into the calendar on my phone (including reminders) and planner. I know myself pretty well, and if I don’t plan it all out in advance and have everything ready to go, then there’s no way I’m going to get it all done in the middle of a crazy week. I store all of this information, including links and templates for emails in a program called Trello. Trello is also free to use, and it’s a great way to stay organised. It’s like a virtual room full of cork boards, and then I can have different lists on each cork board. I have a board for swaps, and it makes it very quick and easy for me to stay on top of what I need to do (you can even set deadlines and Trello will prompt you to keep them!).
Theme
When I say theme, that also covers exactly what you will be swapping. My swaps are run for card makers, so most of the time we are swapping handmade greeting cards. Every now and then I will run an ATC swap, or maybe we’ll make bookmarks or do a product swap, but mostly it’s cards. You need to decide what you will be swapping, and then pick your theme. For us, sometimes that theme is open, so for example, when we did our slimline card swap that was the theme. Participants could make it suitable for birthday, sympathy, thank you, congratulations, wedding, funny, serious, masculine … whatever they liked! When we are doing a regular card swap, though, I will pick a specific theme.
I try to think about the cards we use most, and overwhelmingly that seems to be birthday cards (I know I never have enough in my stash!). This year the request was made for a Sympathy card swap. I actually just sent those out, and the work was beautiful! Sympathy cards are the kind of thing that you don’t know you’re going to need until you need it, and when you need it, you are not in the mood for card making. So those who joined the swap will now have 8 sympathy cards on hand so they can concentrate on sending them to the person who needs those words of comfort, instead of stressing over making the perfect card in a time of crisis.
We have a Christmas card swap every year, usually sign-ups open in October, and they’re due in November. That is our last swap of the year, and a great way to get organised for Christmas if you decide that you are going to send handmade Christmas cards (I talk about that in Episode 19, A Handmade Christmas).
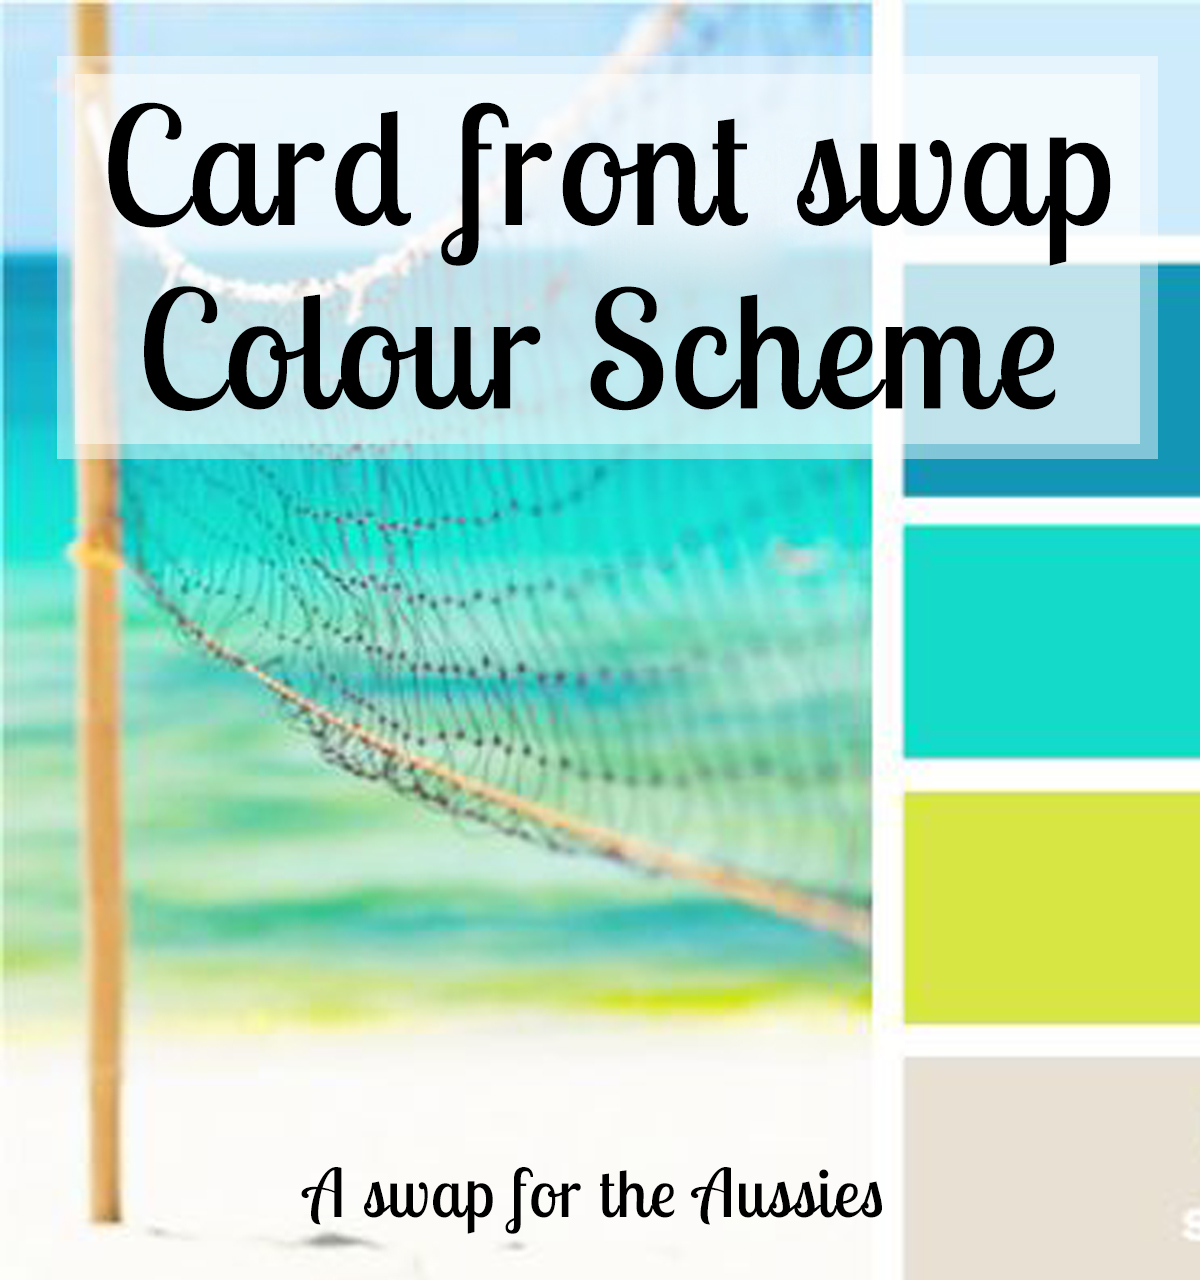
Each year I try to include a colour scheme swap. I’ll hit up Pinterest and search for colour schemes. I really enjoy the colour combinations that Design Seed put together, and I’ll usually draw from one of those for our colour scheme swap. The rules around this are that these colours should be the primary focus of the card, but the addition of black, white, kraft, silver, gold, copper, etc is ok. It is always fascinating to see how people interpret the colour schemes, and you can see a video slide show of the amazing entries for that swap HERE.
Other themes I’ve worked with include, floral, masculine, kids, congratulations, thank you, animals, fandom, product specific, brand specific, white with one (where you only use white and one other colour), single layer, shaker cards, interactive cards, monochromatic, complementary colours, ink blending, paper folding, card sketch, cardstock only (no pattern paper) … and the one constant in all of my swaps is that it must include stamping on it somewhere. The reason for this is that I own a stamp store, and so we stamp!
Just because I do card swaps doesn’t mean that’s what you need to do. My friend Marni (you met her in Episode 5 where we talked about the top 10 things you need for quilting) is running a swap for her community, and they are swapping fabric! At the end of the year they will use the fabric pieces to make a quilt for themselves, with pieces from all of their online quilting friends. Have a think about what your community is into, what they accumulate, enjoy making, and use that as your swap theme. Maybe it’s recipes (but not that dodgy chain email that does the rounds, I’m talking properly printed out recipes), or buttons, or embroidery thread, knit or crochet squares, patchworked pieces, english paper piecing squares, fat quarters … find what works for your people and give it a go!
Quantities
When deciding quantities, I take a few things into consideration, mostly cost of post, cost of materials, time needed to make swap items and naturally occurring quantities. For example, when I first started hosting card swaps, it was the whole card and an envelope to match. Everyone would make 6 identical cards, I’d swap them around and send them back 6 different card & envelope packs. We did that for many years … and then Australia Post put up the price of stamps to $1 each. It pushed the price of posting swap envelopes to a ridiculous cost, so I figured out a way to make it more affordable. Now, instead of a whole card plus envelope, we just swap card front panels. By cutting out the envelope and card base, it has become more affordable to swap again, taking postage down to $2.20 from the $6 mark that it had become (and that’s each way!). I have also changed the quantities, because it is only logical to take 2 sheets of A4 cardstock, cut them down into four A6 pieces, which gives us 8 card front panels. And because they are just the panel (and they don’t have to be heavy weight cardstock) it’s no different to send 8 than it is to send 6! This year we had a slimline card panel swap, and we all made 6 of each, because you get 3 slimline pieces from a sheet of A4 cardstock. So when you’re planning quantities, think carefully about making it a no-waste situation for materials, and affordable postage, because the swappers pay post both ways.
A commonly asked question about my swaps is around cost. For my swaps, and indeed for any swap I’ve ever been part of, it is a free activity. Participants don’t pay a fee to be part of the fun, but they do pay for post both ways, which I’ll talk about in more detail later.
Dates
I never have swaps announced, running or due in December … with Christmas it is just too crazy to even try. I will often skip January as well, because the long summer school holidays make it hard for people to give their full attention to a swap. Once I did run a kids swap for the OzSwap members’ kids, which they really enjoyed, and summer holidays were the perfect time for that. If you’re in another country, be aware of your longest school break, and skip swaps at those times if they affect your community.
I like to announce a new swap on Monday, allow a full week to sign up, and send details to all participants the following Monday. In my current swap format I require a minimum of 8 people for a swap to go ahead. If those numbers are reached quickly, I will start sending out confirmation & detail emails sooner so people can get started. I do allow late sign-ups if the person is confident that they can get their swap to me by the due date.
If people are unsure if they will have time to participate, I encourage them to start designing their card in that sign-up week, and if they are happy with their design or prototype, and find they have time to get it done, to make the cards first, then sign up!
I allow 5 weeks from the announcement of the swap to the due date. This gives a whole week for people to sign up, and one month to create, pack and post their swap items. I have had shorter deadlines, and longer, but for the style of swap that I do, and the people who join them, this timing seems to be the sweet spot. I allow 1 more week for stragglers to arrive, and make my plans to swap out, pack and post the following Friday. This makes the life cycle of my swaps 6 weeks from start to finish, and swaps usually start arriving to people around the middle of the 7th week.
Graphics
I like to make up some fun graphics that go with the theme of the swap. I will either use photos I have taken myself, or pick up some royalty-free images from a website called Unsplash. I simply run a search for birthday, or Christmas, or whatever the theme is, and look for 3 photos that are going to look good together, but that will also look good in a square image (for Instagram and Facebook) as well as a tall image (for Instagram Stories and TikTok). If they will also look good in a landscape format for newsletter, blog and sign-up form headers, then all the better!
I then take those images and create:
1 x square graphic for Instagram & Facebook
3 x portrait graphics for Instagram stories
1 x wide & short Newsletter graphic
1 x landscape graphic for blog
On these graphics I add text including the name / theme of the swap, a note that this is for Australian swappers only, the due date, and my website / blog post. The graphics are there to grab people’s attention, and the majority of the typed information leads people to the blog post where they can find the full details.
I have been using Photoshop for many, many years, though recently I switched to Affinity Photo, which is way more affordable, as you only make a one-off purchase. However, if you’re not a seasoned Photoshop user, I highly recommend Canva. There is a free version, and templates for pretty much every social media graphic you’ll ever need. You can import your own photos or choose from their excellent library of photos, clip art and fonts.
The last thing I create is an A4 checklist that I save as a PDF. This has everything that my swappers need to know, and can check off to make sure they’ve added everything to the envelope and done all of the steps. You can see an example of this on any of my swap blog posts, and I’ll link to my most recent post in the show notes. I always embed the PDF into the blog post so that the reader can simply click the graphic, which opens the PDF, then they can save or print it.
So now that the background work has been done, it’s time to announce the swap and get people to sign up.
Signing Up
Before we get to the technicalities of sign up forms, let’s talk about international swap participants. My swaps are for Australian swappers only. This is for a couple of reasons. Firstly, international postage is quite expensive. Secondly, it’s not as simple as putting postage stamps in for return post, because Australia Post will not accept postage stamps from other countries. For international post you need to send a Paypal money request, and when you have a large group, that can become quite complicated. When I first started swapping, it was unusual in Australia, yet very popular in the USA. If you wanted to join an American swap, you had to be sure to ship really early so it would meet the deadline, then wait for a Paypal money request, and return shipping would often be startlingly high! There is already so much time involved in hosting a swap, that adding currency conversion and international postage to the mix can just be too much. So, this is why I stick to Australia only for my swaps.
Each swap group or host will do signups differently, it just depends what works for them. Currently I use Jotform, which is a website that allows you to build all sorts of useful forms for people to fill in. You can have up to five different forms on the free account, though it’s helpful to note that you’re limited to 100 form submissions per month (total). If you’re only using it for swap sign-ups, you’re not likely to hit the limit each month. You could also use Google Forms, but I prefer Jotform because I receive an email every time someone signs up with the form, and they receive a confirmation email as well.
When people sign up for my swaps, I ask for their name, email address, and have them check a box that says they agree to abide by the rules and guidelines for this swap. This helps me send details and updates to all participants via reply email, and I file all emails in a swap folder, under a sub-folder named with the month, year and theme of the swap. This helps me find all participant emails in one place. I also create a spreadsheet using Google Sheets which helps me keep track of how the swap is progressing. Of course you could use Excel, or even a good old fashioned notebook. I like to note the participant name, the date they signed up, and then I have columns to note when they inform me they’ve posted their swap, the date their swap envelope arrives, and any updates I may have sent them. Usually a week before the due date I will check my spreadsheet and email everyone whose swap hasn’t arrived, unless I see that they’ve already notified me that it has been sent. If somebody contacts me to tell me that something has come up and they need to drop out of the swap, I note that on the spreadsheet as well. I always ask people to let me know if they’ve posted their swap so I can be sure to wait for it in case it’s taking a long time to be delivered by Australia Post.
Deadlines & Late Swaps
When it comes to due dates and deadlines the host gets to set the rules. If you’re willing to wait, you can. But if you have a really tight schedule and you decide you’re not going to accept late swaps, then you can do that as well. The most important thing here is to be VERY clear to swap participants about the rules and how strictly you will be enforcing them. Hosting a swap is a lot of work, so it’s fine to set boundaries around what you will and will not do and accept for your swap. I’ll give you an example … I am flexible around the due date, especially when there are floods, bushfires or a pandemic. I have chosen to be flexible because sometimes delays just can’t be helped, and as we all know, in times of crisis, fun craft swaps are often the last things on our minds. If you tell me that your swap is on the way, I will wait for it. However, if I email you a week out from the due date and don’t hear back from you, I will not wait for your envelope. Inevitably, every single swap, there are one or two people who sign up, then never reply to emails or send their swap items in. Sure, I’d prefer to know if you need to drop out, but sometimes life happens, and a swap is the last thing on your mind when you’re under a lot of stress. I’m not mad about it, and I won’t tell you that you can never sign up for a swap again … I’m not that kind of host. BUT … if I don’t know that your envelope has been posted, I will not wait for it. I am very clear about that, and I mention it in the initial announcement, the blog post, the sign-up form and follow up emails. In my current swap format this has only happened once, and in this case I’ve just held over that envelope until it can be slotted into a future swap with a matching theme. I have this rule because it is unfair to keep others waiting, especially when they did the right thing by posting their swap envelope on time. The down-side to being flexible around accepting late swaps for me is that I do have a really crazy schedule, and if I can’t swap out on the day I’ve allocated, then sometimes it takes another week before I have that block of time to swap out. I don’t like keeping everybody waiting, but the swapping out and packing can take hours!
Packing
Speaking of packing, this is something that needs to be given some thought. I have very strict guidelines around packing, for which are there for several reasons. So that everyone understands the way that swaps need to be packed, I have a video that shows the proper way to pack a card front swap. I always add a link to that video in my blog post and in the information section of the sign-up form.
For anyone participating in my swaps, the things you need are pretty much always the same, therefore it can be handy for participants to have a swap kit. It’s not an official thing, but it is handy to have if you’re participating in swaps regularly. As a host, once you refine your packing and posting methods for participants, it’s helpful to set clear guidelines around what is needed so that swaps don’t cost a fortune to post, arrive safely, and minimise the amount of time you spend swapping out. Mine is part of my checklist, and it includes one large sealable bag, one large piece of stiff cardstock, two C4 envelopes, 5-6 postage stamps and 8 peel & seal baggies.
Firstly, a reminder that I am talking about Australia Post, where our postage stamps cost $1.10 each at the time of recording. If you’re overseas I imagine that your postal service will have different rules around weight, thickness and cost of postage for envelopes. We use C4 envelopes (sometimes C5). The cost to post a C4 and C5 envelope are exactly the same, and the weight and thickness allowances are the same for both as well. A lot of the time, 8 x card panels in baggies plus the envelope will weigh under 125g, so that will need 2 stamps to post. Sometimes, though, the swaps you send may be light, but the swaps you receive in return may be heavier or bulkier, therefore requiring a third stamp on that envelope. It is for that reason that I ask everyone to include 1 extra stamp when they pack their swap. If their swap weighs over 125g, then I use it, but if it’s not needed it just gets packed back in with their return swaps so they can use it next time. This way I’m not out of pocket, envelopes don’t get caught up in the system because they’re underpaid, and there are no ransom demands from the post office that need to be paid so you can retrieve your happy mail.
I prefer everyone to use a C4 envelope, because it cuts down on bulk. When you lay out your eight A6 panels in two layers of four, they will happily fit through the 2cm slot of doom. However, C5 envelopes are fine for card front panels, because they’re not super thick, and four layers of two will still fit through the slot (unless everyone has gone bulky).
That leads me to the guidelines for creating a card panel. I specifically ask that the panels not be too bulky, simply because this leads to excessive postage for everyone. It’s important to me that swapping be a fun activity, accessible by people on all budgets. When we start getting up to 3 stamps both ways (or more), that’s currently $6.60 just for postage. That is why I repeat myself like a broken record … keep it low profile!
My next packaging must-have is a piece of stiff cardstock. I have seen everything from sturdy chipboard to cereal boxes to beer cartons. One clever solution is a piece of cardstock that has been laminated, and I really like that because tape peels off it easily and it can be re-used over and over again! If you are participating in a swap and think this is a great idea, I will recommend that you trim your A4 cardstock down a little before laminating, that way your A4 laminator pouch can seal all the way around, even trimmed down to A4 size for an optimal fit into a C4 envelope. Having a piece of stiff, yet lightweight, cardboard in your envelope discourages rogue posties from folding your envelope in half. I also recommend that people write ‘Do Not Bend’ on both envelopes. It’s awful when someone puts a lot of work into their swap items, then someone in the postal delivery line folds it in half! The words ask them not to fold it, but the cardboard makes the task more difficult.
Another must-have piece of packaging is plastic bags. One large bag that everything fits inside, and individual baggies for your swap items. I like the peel & seal bags that fit an A6 panel nice and neatly, because you can also fit an envelope in there. Hear me out … when you receive your return swap, just take the panel out of the baggie, glue it to your card base, add an envelope, then store it in the baggie until you want to use it. Those bags can be used over and over again, because once you send that birthday card, you can pop the empty bag in your swap kit, ready for your next swap. The larger bag serves 2 purposes … it keeps the contents of your envelope dry in case of wet weather (which has happened to many a swap envelope in my experience) and it keeps the contents together in case of a torn or damaged envelope. The large bag is often a zip lock, but a large peel & seal bag will work pretty well also (and it’s less bulky).
This one is important, even though you might not think about it … let’s talk about tape. I’m about to re-make my packing video, because I’ve noticed that people go seriously overboard taping their 8 swap baggies to their piece of cardboard. When you have 30 people participating in a swap, and each of those people send an envelope with 8 baggies taped down with at least 8 pieces of tape, that is a minimum of 240 pieces of sticky tape or washi tape that have to be removed. As you can imagine, that is incredibly time consuming for the host! It is certainly a good idea to tape down your swap items so they don’t move around in transit, but card panels aren’t a big problem in making an envelope too thick, especially when they’re in an airtight ziplock bag that’s had the air squeezed out of it. My tip to hosts who may also have this issue is two-fold … demonstrate the preferred way to tape down swap baggies, and open every envelope as it arrives and remove all of the tape that holds baggies onto the backing card. Doing them one at a time is less painful than doing them all at once. Also … keep all of that tape with the swap envelope. If they have a laminated card, I stick it to that, otherwise I stick it to the outside of the large bag.
This leads us to …
Swapping out
Depending on the number of people in your swap, this can be quite a time consuming task. If your people are making 6 items each, and there are only 6 people signed up, it’s going to be very straightforward. But when you have people making 8 items each and there are 30 people signed up, you’re going to want to put on something binge-worthy on Netflix!
Let’s start at the very beginning of this process … the envelopes start arriving. Where will they arrive? Your home? Your office? Your PO Box? When I hosted for OzSwap, envelopes came to my home. Very quickly swapping became a BIG part of my life, and large C4 envelopes were showing up almost daily, but my letterbox was inadequately tiny. Yes … I went out and bought a large letterbox that safely accepted C4 envelopes without them needing to be folded by the postie. I loved that letterbox. When we moved house I was lucky to have a wide section of my weird letterbox / planter box that accommodated large letters. However, when I started running swaps for the Scrap It TV community, I switched to a PO box rather than giving out my street address, just in case someone turned up at my home (it happened once … it was weird). Now the ladies at my post office have a tub where all those big swap envelopes go, and I just pick everything up at the counter. Remember, I also have a business, and I receive a lot of product to my PO Box, so this is a business expense for me. I’m not saying you should have a PO Box if you’re hosting, or that you need to buy a new letterbox, but you should do what is most comfortable for you and make sure that you can receive swap envelopes in good condition. These days I do have a few local peeps who drop off and pick up their swap envelopes, and one lovely lady whose home I drive past regularly, so I drop her swaps off to her when she joins in.
Next, it is helpful to have a single spot where you can put every swap envelope. You do not want to just put them down, then get to swap out day and realise that you can’t find them all. I have a tub on a shelf in my office where every single incoming swap envelope goes, and that is a non negotiable rule I’ve set for myself. If you have small humans or curious pets in your home, perhaps a tub with a lid will keep climbing kitties and sticky fingered kiddos from tearing swap envelopes apart. Thankfully I never had any toddler mishaps with swap envelopes that arrived, but my kitty has gnawed on several untended plastic bags … so I used a tub with a lid in her early kitten days). Also, as I mentioned earlier, I like to open every single envelope as it arrives, remove the baggies from their taped-to-the-backing-card state, and leave them loose in the bag. This is the time that I will also check that there are the right number of cards inside the bag, that there is a return envelope with sufficient postage and check for notes (sometimes people purchase additional baggies from me to be returned with their swap). This makes things a lot faster when I sit down to swap out after all of the envelopes arrive.
Set a reminder in your calendar the week before the due date and send a reminder email to all participants whose swaps have not arrived (unless they’ve already let you know that it is on its way … this is why I have a spreadsheet). In this email it’s important to be clear about your rules about deadlines for your swap. If you aren’t accepting swaps that arrive late, you need to let them know that they should post in the next day or two, or drop out if they can’t get that done. If you’re flexible around due dates (as I am, especially during a pandemic and bushfire season), you still need to set boundaries and be clear about them (like my boundary of not waiting for an envelope if I haven’t been notified that it has been posted). There will likely be a flurry of post arriving in those last few days.
So … now you have all of the envelopes. What next? When it is a small group, it’s nice and easy, but when I have 30 envelopes, I need to split them up into smaller groups to make the process less confusing. I do my swapping out on the floor in front of Netflix for these big swaps, but when there are 10 envelopes or less, I use my dining table. You could also use a long kitchen island (assuming it is sparkling clean), and in a pinch a freshly made bed is a great surface. I always place the envelopes in a portrait orientation as it saves space and keeps everything close together.
Lay out all of the envelopes so they’re in a line, or go around the edge of the table (or bed) and make sure they’re all where you can see them. Once I thought I was a little tight on room, so I put one envelope kind of behind me on the couch … and promptly forgot about it! I had to do some complicated fidgey-widgey stuff to sort that out … so keep everything where you can see it. If your surface is small and you need to lay them out in two lines, that’s ok too … just keep them as straight and organised as possible.
The next thing I do is remove the contents from each envelope, discarding the outer envelope, leaving just the bag with cardboard, return envelope and swap items inside. Then I will remove the swap items from the large bag and place them in a stack toward the top of the bag. If you are new to the whole swapping out thing, I strongly recommend you take a photo at this stage. This is helpful if you make a mistake and need to start over.
If you have a swap where everyone sends in 8 items, and you only have 8 people signed up, or only 8 items arrive, then it is inevitable that everyone will receive one of their own items in return. If you look at any of my swap announcements or swap blog posts, you’ll see that I am clear with my swappers that if we have more than 8 people signed up, they will not receive one of their own items in return. In this instance, I actually encourage people to make an extra to keep for themselves, but if they aren’t able to do that, and they want one of their own pieces back, they should include a note. It doesn’t happen very often, but it does sometimes, so I will put that note on top of the stack of cards. And now we can begin!
Starting at one end of the line of swap bags, pick up the stack of swap items, and put one on top of the next bag (I like to build a second stack, so I know which are the incoming and which are the outgoing), then the next, then the next, until you run out. Then, pick up the next stack of swap items and repeat. If you get to the end of the line and you still have items in your hand, go back to the beginning of the line and distribute one item per envelope until you run out again. If a person wants one of their own, instead of starting to distribute their items onto the next envelope, simply start with theirs … and here’s the important part … make sure you skip their envelope on the next round! You need to make sure that everyone has the same number of items returned to them as they sent in. Once all items have been redistributed you will have a stack of cards at the bottom of the bag and none stacked at the top. This is the time where I will pick up one bag with the cardboard & envelope inside and the swap items on top, count those swap items, and drop them into the bag. Do the same for all of the envelopes, and if you have done it correctly, every envelope should have the same number of items. If that is all of your swap envelopes done, and they’re all correct, pop them back in the tub (I like to stand mine up), and you can now work at your desk, table, or wherever is comfortable for you. I may swap out sitting on the floor, but I am getting too old to stay down there any longer than necessary, so I do the final stage at my desk. If you have a large number of envelopes that you have split out into two or three groups, pick up the next grouping of envelopes and repeat this step until all envelopes have been swapped out. Now you can move on to repacking.
To repack your swap items, use your own packing guidelines. Before I start packing anything, I take a kitchen scale (which I keep in my office, but I did this with my actual kitchen scale for years) and weigh each bag. As I mentioned earlier, here in Australia you need 2 postage stamps if the envelope is under 125g, so I check the weight. If it’s under 125g I leave it as it is and put it back in the tub, but if it is over 125g, I check the return envelope and add a third postage stamp if it’s needed. I didn’t used to do this, and it was so frustrating to take them to the post office only to find out it was too heavy, then I’d have to take it home, unpack it, find the spare stamp (and trust me, sometimes there isn’t one), then repack it and take it back. Checking before I pack is such a time saver!
Once I’m sure the return envelope is correct, I lay out the swaps on the backing card, use their tape to secure everything, slide it into the large bag, seal it, put the large bag into the envelope and seal that. I also tape the envelope flap shut, just because it feels more secure to me. All of the sealed envelopes go to the post office, and I let all swappers know that happy mail is coming their way. My job as host is now done!
It is very rare that a swap envelope will get lost in the mail. Sometimes they move really fast and people start receiving them the next day. Sometimes they have to travel a long way and can take weeks. I think in all my years of swapping only 2 envelopes have gone missing, which statistically is pretty good!
Honourable Mentions
Lastly, there are three unusual swap types that you might like to try once your swap community is well established and you’re feeling confident as a host. I don’t think I covered these in my previous episode about craft swaps, so I’ll go over them here.
1. Round Robin Swap
When I was with OzSwap we did this a couple of times with a puzzle. From memory, someone made a printable puzzle design (I think it was me), and we printed it and cut it out by hand to use as the base. Let’s say you have a 6 piece puzzle, then you need 6 or 7 people to be not only signed up for this swap, but committed to it as a long term project. The host lets each person know who they would be posting to, and each puzzle would travel around to every participant. Each person set their own theme for the puzzle, packed it up with an information sheet about their theme and sent it to the person they always posted to, so everyone received a blank puzzle. We would decorate one piece of the puzzle, according to the theme, and then pack it up and send it to our puzzle partner. Then we’d receive a puzzle with a single decorated piece, decorate one of the blank pieces, and then send it on again. The last puzzle that we received was our own, with every piece fully decorated … a complete puzzle. It is the job of the host to make sure that everyone stays on track to the timeline, and the participants had to stick to that deadline so that the puzzles moved around at an even pace. It was a long time ago, but I think we had a 2-3 week turnaround. If you make the posting deadlines too close together, it doesn’t allow for travel time and there’s not enough time to decorate. But if you make the turnaround times too long, then the swap goes on for months and months, running the risk of life getting in the way or people getting bored with it. This type of swap is suitable for a small number of very dedicated swappers, though it can work well at a live event where you get 20 minutes to decorate your piece before passing it to the next person. It would also work well for members of a craft group that gather locally on a regular basis. I will add photos of my two beautiful puzzles over on the blog. One was a Barbie theme, the other was chocolate themed. One day I’ll take them out of their boxes and put them in a frame! You could do this with a story, a menu, a patchwork square, a crochet blanket … lots of ways that many people add to a single project.
PHOTO – PUZZLE SWAPS – Coming Soon
2. Swap Swap
I don’t remember whose idea this was, but the Swap swap was another one that works best with a trusted group of hard-core dedicated swappers. One of the pitfalls of swapping is that sometimes you end up with pieces you won’t use. Maybe they’re not the right colour, theme or to your taste. It happens, and those pieces languish in a drawer, not because there’s anything wrong with them, but maybe you don’t have any boys to send that Bob The Builder birthday card to, or all your cards are pink, and you don’t have anyone in your life who likes pink. I have seen these run two ways. The first is exactly the same way that I run swaps now. People could send in 6 completely different cards, and get 6 different cards in return. Sure, you run the risk of getting one of your own cards back, which I’ll admit … kind of stings, or getting something again that you won’t use, but it’s pot luck, and it’s fun. The other method is very fun, but again, you need to do this with trusted swappers who are going to keep to a schedule and carry through with it. This is the pizza box method. When I hosted this swap, I took a clean pizza box, and put 25 swap items from my own collection inside. These were items that were gorgeous, but I just had no use for, and in some cases they were prototypes or duplicates I had made for previous swaps. I packed it up and sent it to the first person on the list, and when they received it, they took out the pieces they wanted, and replaced them with items they didn’t want. There were always 25 items in the box, and I provided everyone with the name and address of the person they were to send it to. Because this required zero making, just swapping, it had a really quick turnaround. At the end, the pizza box came back to me with mostly different pieces inside. That one was fun!
3. Kit Swap
Kit swaps were small, with only 4 participants, and everything was guaranteed to coordinate. That’s because it started by me making a mini kit and sending it out to participants. Yes, I paid for postage, so I kept it as economical as I possibly could. Each kit had some pattern paper and embellishments, maybe ribbon or twine, which all coordinated, and there had to be enough that it could be split out to make 5 identical swap items. Everyone was allowed to add whatever cardstock and other embellishments they felt would work. This was in the days when we swapped mostly scrapbooking embellishments, we’d set a theme, like Beach, and then there were item choices like title, journal box, deco squares, large tag, small tag set or border. For this swap they could choose what they wanted to make instead of everyone picking from allocated items. But you may be thinking … 4 participants, and they make 5 items? That’s not great math, Dawn. Well … the fifth item was for the host, as they supplied the gorgeous decorative materials for the swap, and everyone else received 4 items in return, including one of their own, and everybody had a matching set.
There was also a time when I first started running swaps for the Scrap It TV crowd where I made swap kits available for people who wanted to join in, but weren’t quite sure where to start. They could purchase a kit from me which included all of the elements required to create 6 identical swap items, and all they had to do was put the pieces together. But they were incredibly time consuming to create, and obviously they all had to be different, so I only offered them for a short time.
My final word of advice for hosts. Start small, find what works for you and your community and be very clear in your communication. Also, don’t forget to download your free Swap Host Checklist on the blog. And for swappers, read the information, ask questions if you need to and hit your deadlines. Most of all … have fun with it, enjoy the process and be sure to do a little happy dance when your swap envelope arrives.
If you are a card maker in Australia, and you would like to join one of my swaps, I have a new swap opening this month, which is helpful if you’re listening when this episode goes live. But if you’re listening later, and still want to join, you can always sign up to my email newsletter to be notified when a swap is happening. There is also a swap tab on the website where you can find the latest information, including the date of the next swap announcement.
LINKS


Episode 12 – Clever Craft Storage Solutions
Episode 19 – Handmade Christmas
Episode 5 – Top 10 things you need for quilting with Marni Franks